What You Need:
--- Animal with feathers illustration: In this case, the Heron from Animal Kingdom by Millie Marotta

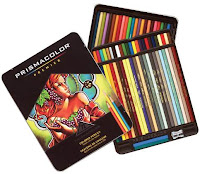
--- Colored pencils. Mine came from a Prisma Color Premiere 78 piece set.
--- Sharpener : Always keep your pencils sharp. They give the best color pay-off when they are. Pick a decent one and remember to rotate the sharpener and not the pencil. This allows you to feel when it is about to break as your hands are closer to the head/ tip versus when you are holding on to the body.
--- Eraser : For broad parts, I use the Derwent block eraser. For small lines, the koh- i - noor pencil eraser.
--- Color Wheel : If you find it hard to pick shades, this will definitely help.
PROCEDURE:
1. Color Picking: I usually go through the front of the wheel and rotate the wheel. The shades that show up on the squares, show good combinations.
I pick one of the colors that showed up and then flip it over and look for that exact shade. It will now show me the darker and lighter tones of that particular color. So example, yellow, here's what I will look for:
2. For the thinner feathers: So I set aside these tones versus my color pencils. In this case, I chose PRISMA 917, 945, 916. Then a bold red and black - 924 and 935 for shadows.
3. Stroking: When coloring, start with hard pressure then slowly move to medium then light. You can practice on a different sheet and it should look like this:
*** Generally layering of colors is done this way: medium shade, a lighter shade, a darker shade, a highlighter shade ( which is usually mixture of the two primary colors that are side by side the wheel ( so if you are using yellow, then your highlight color is red-orange/yellow), then black for the outline and brown for shadows.
4. Apply Prisma 917 or yellow orange to the edges of each feather. You can start coloring from the uppermost tip then move towards the center. Stop when you've reached 1/3 of the feather. Then go to the other end of the feather and now color upwards, also stopping around 1/3 of the feather.
5. Color over everything you have already colored with Prisma 916, which is a bright yellow. You can extend a little the application just make sure to practice the stroking ( dark to light ) technique mentioned above, and leave white parts in the middle as they act as highlights. If you see white streaks or they don't look seamlessly blended then you need to apply more pressure. This eliminates the need for a blender pencil.
6. Then next is Prisma 945 or a dark yellow brown. Color it over the uppermost and tipmost part of each feather. Apply up to the middle part of the first layer you applied.
7. Color the very tip and the uppermost part of each feather with prisma 924, which is a yellow - red.
8. Sharpen your black pencil to almost the point of breaking ( lol ), Prisma 935. Then outline each strand. Then draw a thin line in the middle of each feather but leave out the middle part.
Be careful with the tips. You can just erase later on.
9. Use Prisma 945 ( same shade as in step 6 ), to draw a very very thin shadow underneath each feather that is floating out of the actual body of the bird. Pressure is hardly there.This is how it would look when you've finished all the thin feathers:
THICKER FEATHERS
1. The process is the same. Only this time, we will use the various shades of blue green and green. For Prisma folks, I used 1006, 989, 911, 992 ( in said order ).
2. This is how it should look:
--- Medium shade: blue green
--- Lighter shade: light green or chartreusse
--- Darker shade: Dark green or dark Olive
--- Highlighter shade: Dark blue green
SMALL FEATHERS ON THE BODY
1. Use flesh as the base color ( prisma pc 997 ). Practice stroking technique over all the said parts:
2. Color the corners and tips with a darker yellow - 1003.
3. Lastly, shadow the tips and the corners with brown. 945.
This is how your feathers should look:
My finished heron looks like this though done in slightly different shades as I used Colleen pencils on this one.


fantastic
ReplyDelete